
Set up Pocpod step by step#
The optional setup flow helps a new account owner prepare the business. It has five steps: Your business, Your plan, Your team, Customer payments and Get started.
Enter your business details#
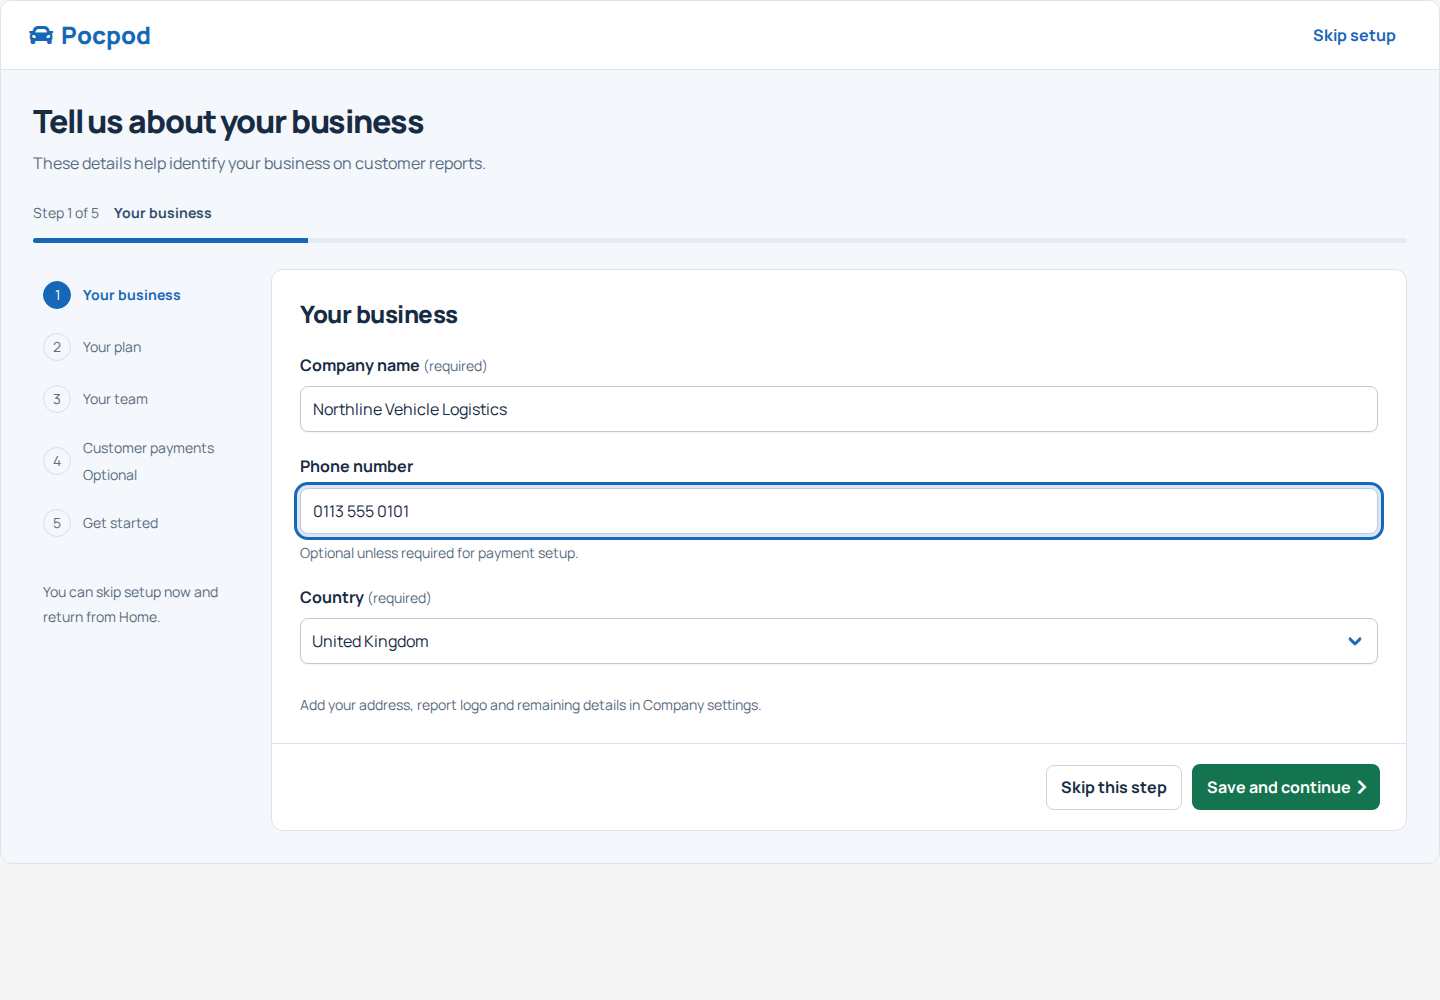
Enter the company name and country. You can also add a phone number. Select Save and continue (Continue on a phone) to save those details and move on.
Add the full address, report logo and remaining information later in Settings → Company details. The short setup form does not replace the complete company settings.
Review your current plan#
The next step shows your current plan. View plans and prices opens the available options, user capacity and price breakdown. Continuing keeps your current plan; it does not purchase an upgrade.
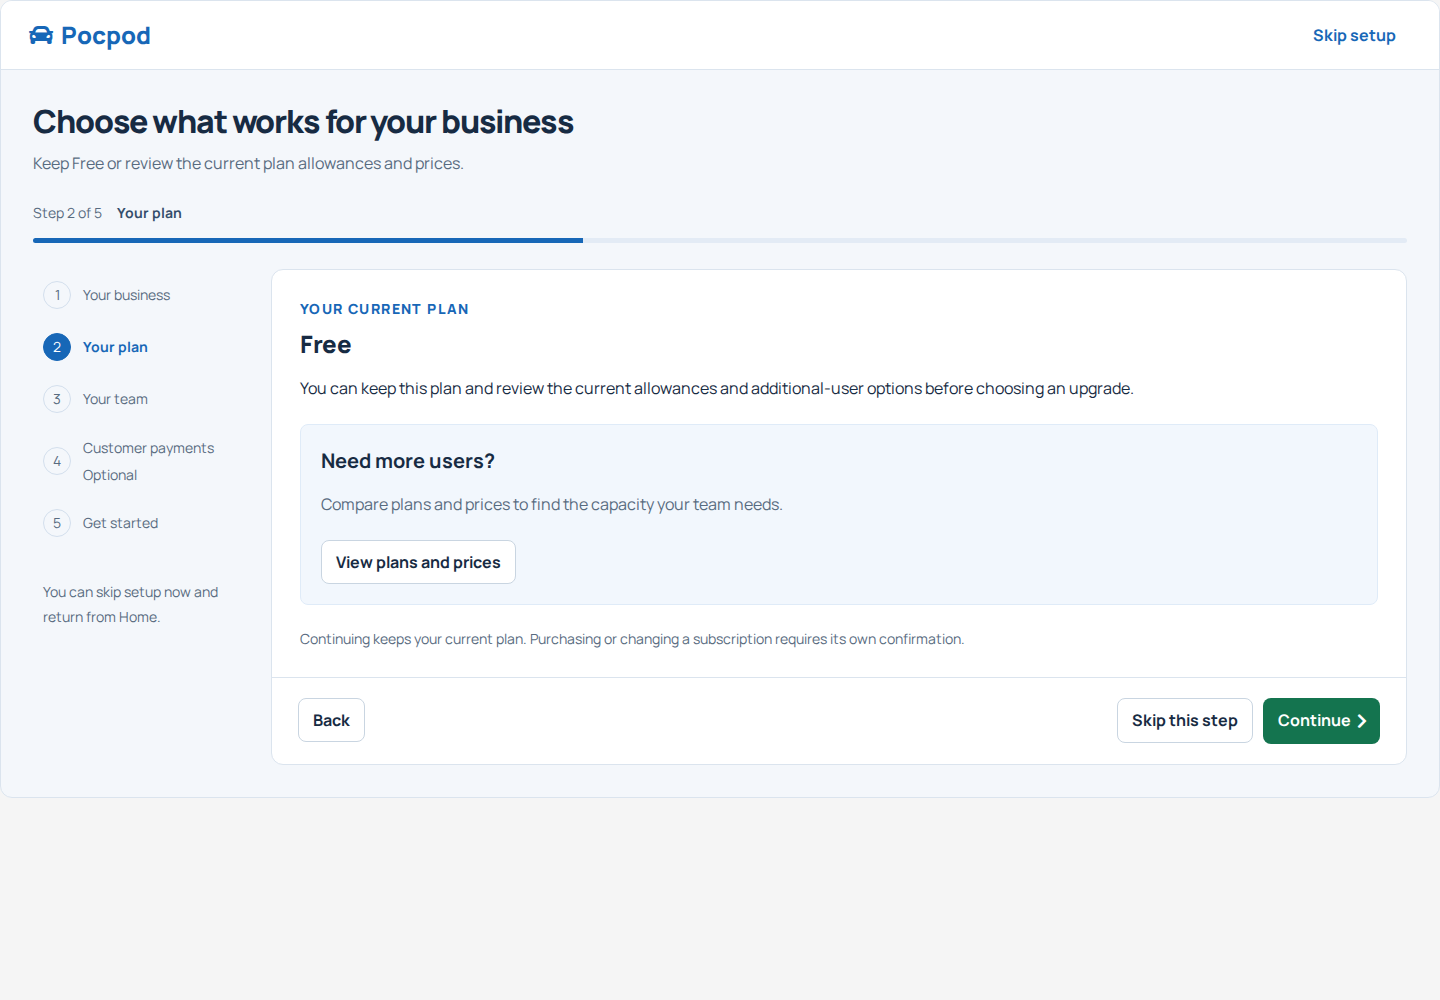
If you choose a paid subscription, review the price and additional-user quantity before continuing to Stripe. Checkout started from setup returns to setup. Cancelling checkout does not activate Premium; a completed payment must be confirmed before the plan changes.
You can keep Free and continue. Customer invoicing/payment fees are separate from the Pocpod subscription; read the current terms before using payments.
Invite your team#
Every person needs an account and an available user place. The team step checks your capacity and offers the invitation flow when available. If you have no spare capacity, review the plan before inviting someone.
You may skip this step and use Users and roles → Users → Invite driver later. An invitation links a newly created account automatically; it does not remove the requirement for that person to register.
Decide whether to accept customer payments#
Customer payments are optional. If you want them, complete the remaining company details and follow Stripe's account setup. Stripe may need further verification before payments are ready.
You can continue while verification is pending, or skip payments entirely. Completing the Pocpod setup wizard does not enable Stripe payments, send an invoice or collect money. See Invoices and payments.
Get ready for the next movement#
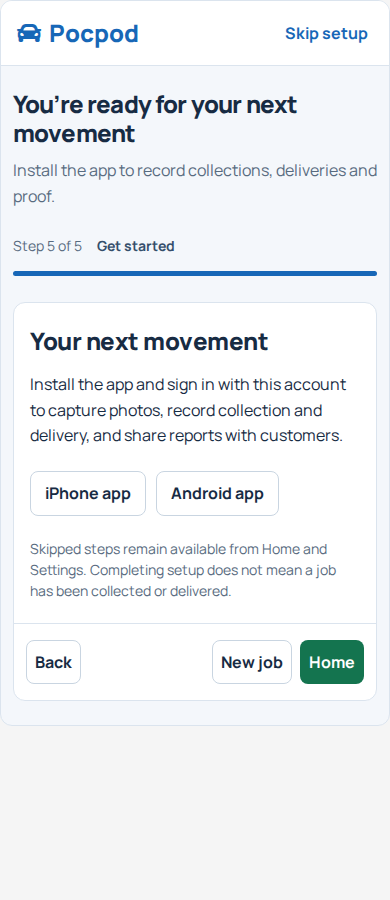
The final step links to the iPhone and Android apps. Sign into the app with the same account to record collections, deliveries, photos and signatures.
Choose Go to Home (Home on a phone), or Create a job (New job on a phone) to start your next movement. Finishing setup does not mark a job collected or delivered.
Pause and resume setup#
Use Skip this step (Skip on a phone) to leave an optional part for later, or Skip setup to return to Home. Your saved progress is retained across sessions.
The Getting started card on Home offers Resume setup when setup is paused. Open it and choose Resume setup to continue from the saved step. You can return to earlier steps to review them; doing so does not undo a subscription purchase, invitation or Stripe account change.
On a phone, the current-step text and progress bar replace the desktop step list. The same five steps and saved choices apply.