
Jobs in the portal#
Use Jobs to create, find and manage vehicle movements. Drivers complete collection and delivery proofs in the app.
Create a job directly#
Open Jobs, then select Create job. Desktop Planner also has this button; on the mobile planner, select an available time slot. Creation is a guided flow:
- Details and customer — choose the assigned user where permitted, add an optional reference/notes, and select or create the customer.
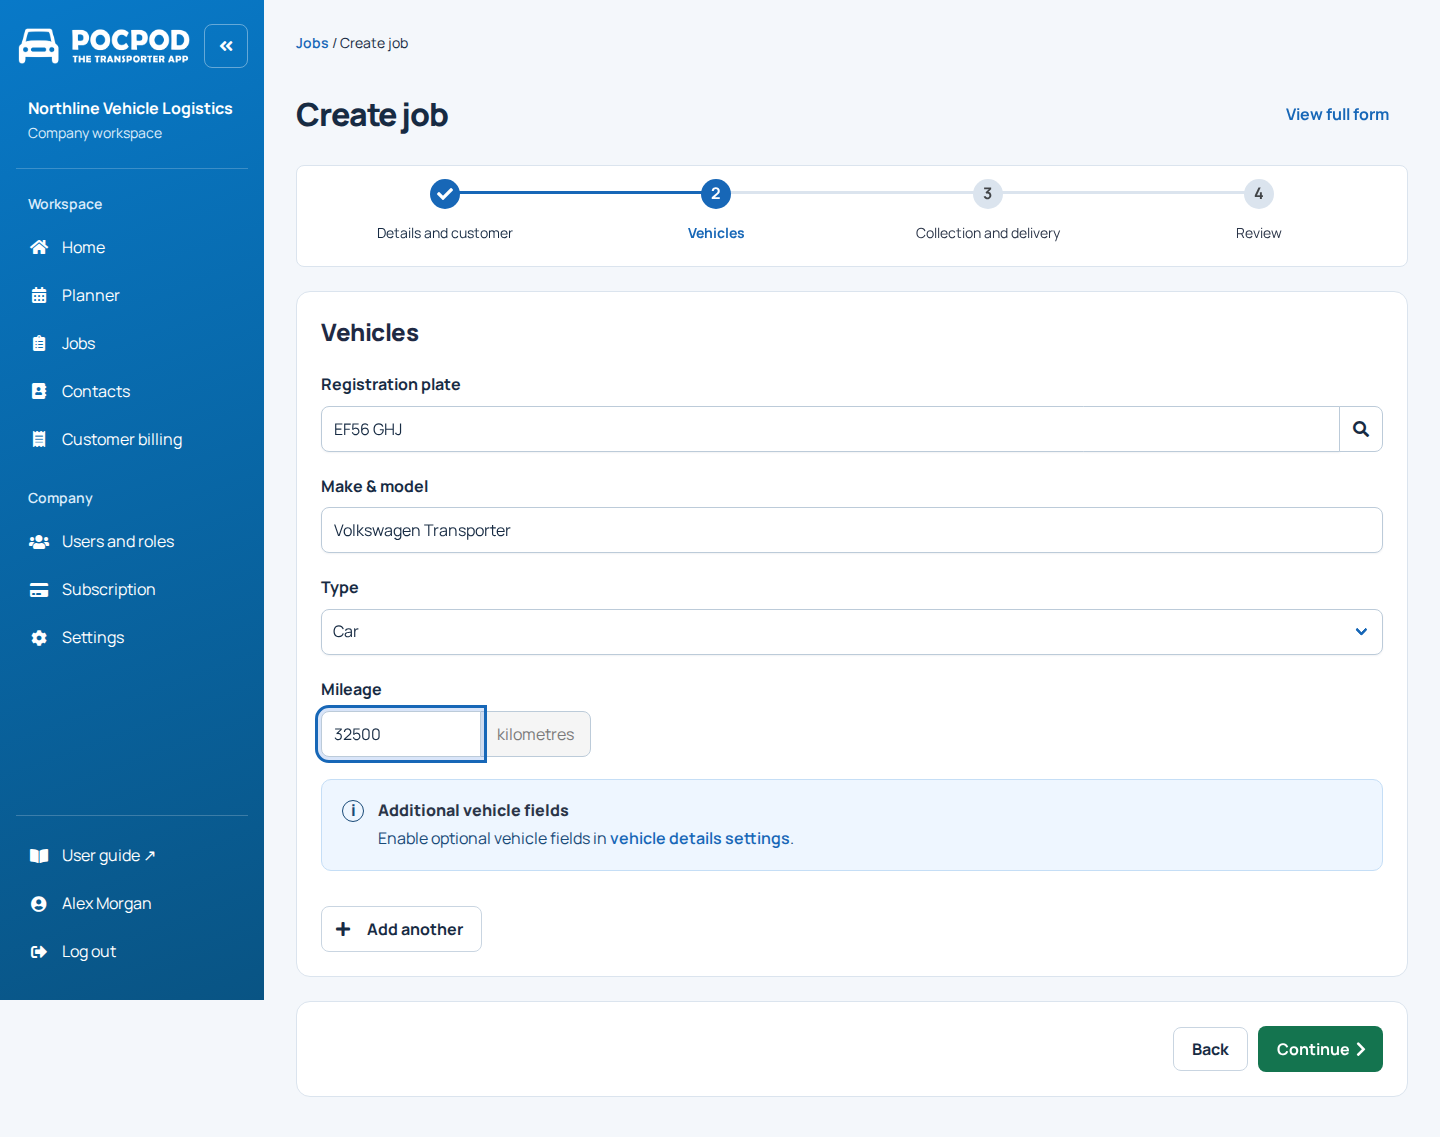
- Vehicles — enter the registration, make/model, type, mileage and enabled additional details. Add more vehicles when needed.
- Collection and delivery — choose contacts or enter locations manually, set the schedule and processing times, and review distance.
- Pricing — review the rate and optional billing arrangement when your permissions and payment setup make this step applicable.
- Review — check the information and choose Create job.
Pricing is omitted when confirmed account restrictions make it irrelevant. Step numbers adjust accordingly. If setup information fails to load, resolve the error rather than assuming billing is unavailable.
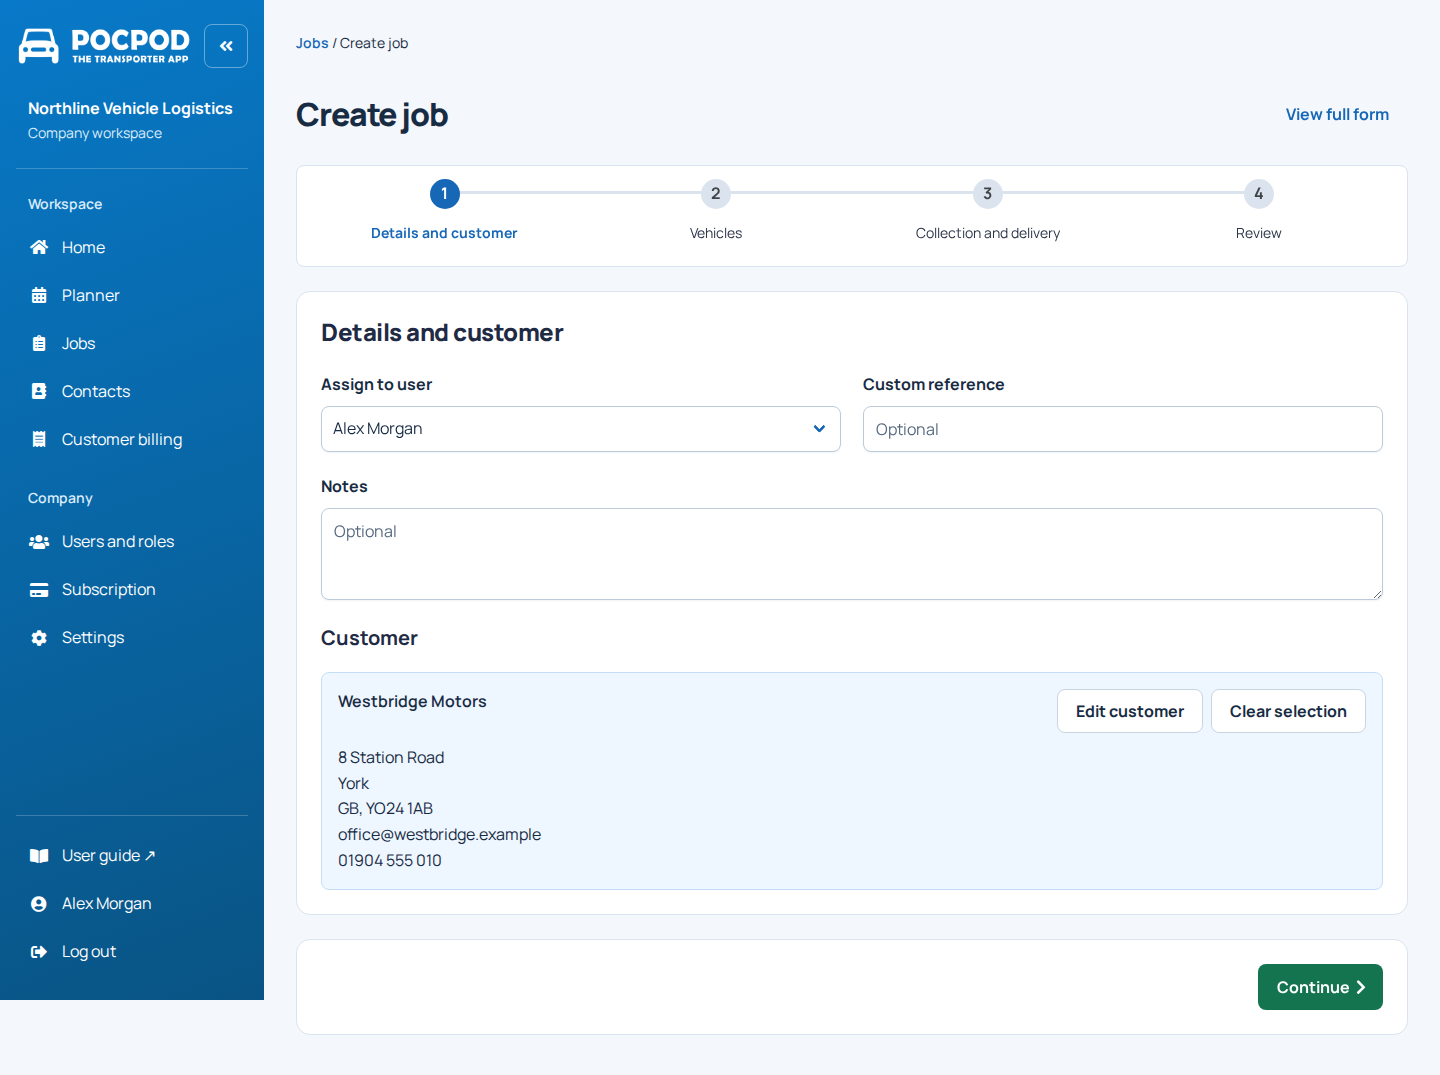
Use Continue and Back between steps. Completed desktop steps show progress. On a phone you use the compact current-step view; the full form and all-steps dropdown are not available. Desktop users can choose View full form and return to guided steps without losing entered values.
Look up a UK registration#
Where available, enter the registration in Vehicles and select the magnifying-glass Lookup DVLA button. Pressing Enter in that registration field also starts lookup. Check returned values and enter anything missing; VIN is not provided by the lookup.
Mileage has an attached miles/kilometres label based on the company configuration. Additional vehicle fields follow the business settings.
Choose collection and delivery contacts#
Use Lookup to select a contact, or Enter manually to enter the stop directly. With an empty search, the selector shows company/customer contacts first and labels their relationship. Typing searches contacts instead of keeping unrelated pinned contacts visible.
Sub-contacts are indented when their parent is shown above them. A matching sub-contact can appear without indentation when its parent is not in the search results.
Check the selected address as well as the contact name and phone details. Collection and delivery may use different contacts belonging to the same customer.
Calculate distance and journey time#
Set a valid collection location/time and a delivery address. Use Calculate below the delivery contact to preview the route and estimated delivery time. Missing prerequisites must be completed before calculation can proceed.
Review the journey before applying it. Distance belongs with delivery details, below the delivery time and above processing time; it is separate from Pricing. Processing minutes allow for checks at each stop, not driving time.
Traffic, loading and vehicle restrictions can affect the real journey. Treat the preview as an estimate.
Review and create the job#
The Review step shows the customer, vehicles, movement and applicable pricing information. Use an Edit action to return to the relevant step. Those actions do not create another job.
Choosing Create job saves the job. If you requested billing, Pocpod creates a billing draft separately; it does not issue an invoice. If the job saves but its billing draft fails, use the offered billing retry. Do not create the job again.
Search for jobs#
Open Jobs. Select Filters to expand the registration, status, user, customer, dates and reference controls. Choose Search to apply them. The compact summary shows applied filters when the panel is closed; Reset clears them.
Desktop shows rows; mobile shows compact cards. A job with multiple vehicles can show the first registrations followed by a count of additional vehicles. Select View job to open the record.
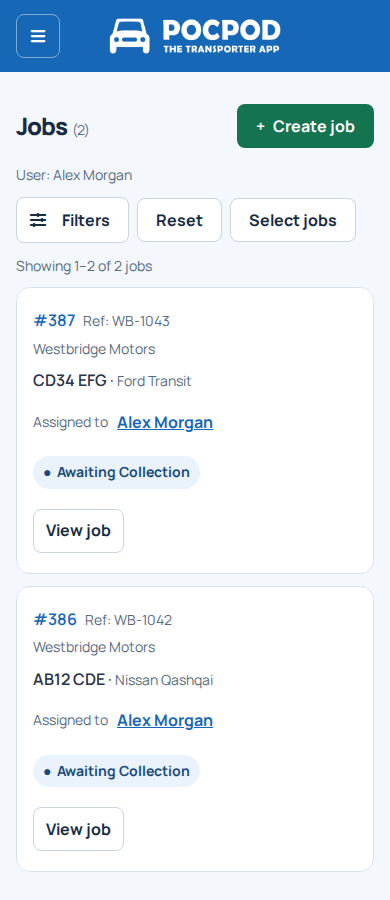
There is no billing setup button in each result. Open the job and expand Billing to view or create its arrangement.
Select, reassign or delete jobs#
On desktop, use the row checkboxes. On mobile, choose Select jobs to reveal selection controls. Use All or None as needed, then choose the available bulk Reassign or Delete action. Check the selected count before confirming.
You can also select the assigned user's name to open reassignment. The new user must belong to the business and be within the available user capacity. Assignment changes reach the driver's app automatically when connected.
Delete only work that should be removed and read the confirmation. Completed proof and audit restrictions can limit changes.
Edit job details#
The job heading shows its registration(s) and customer; the breadcrumb retains the job number. Status appears underneath. A breadcrumb can take you back to Jobs or Planner, depending on where you opened the job.
Use the edit/lookup action beside a field to change it. A single-field dialog may use its title as the field's label. Some completed or proof-backed details are read-only to preserve the audit record.
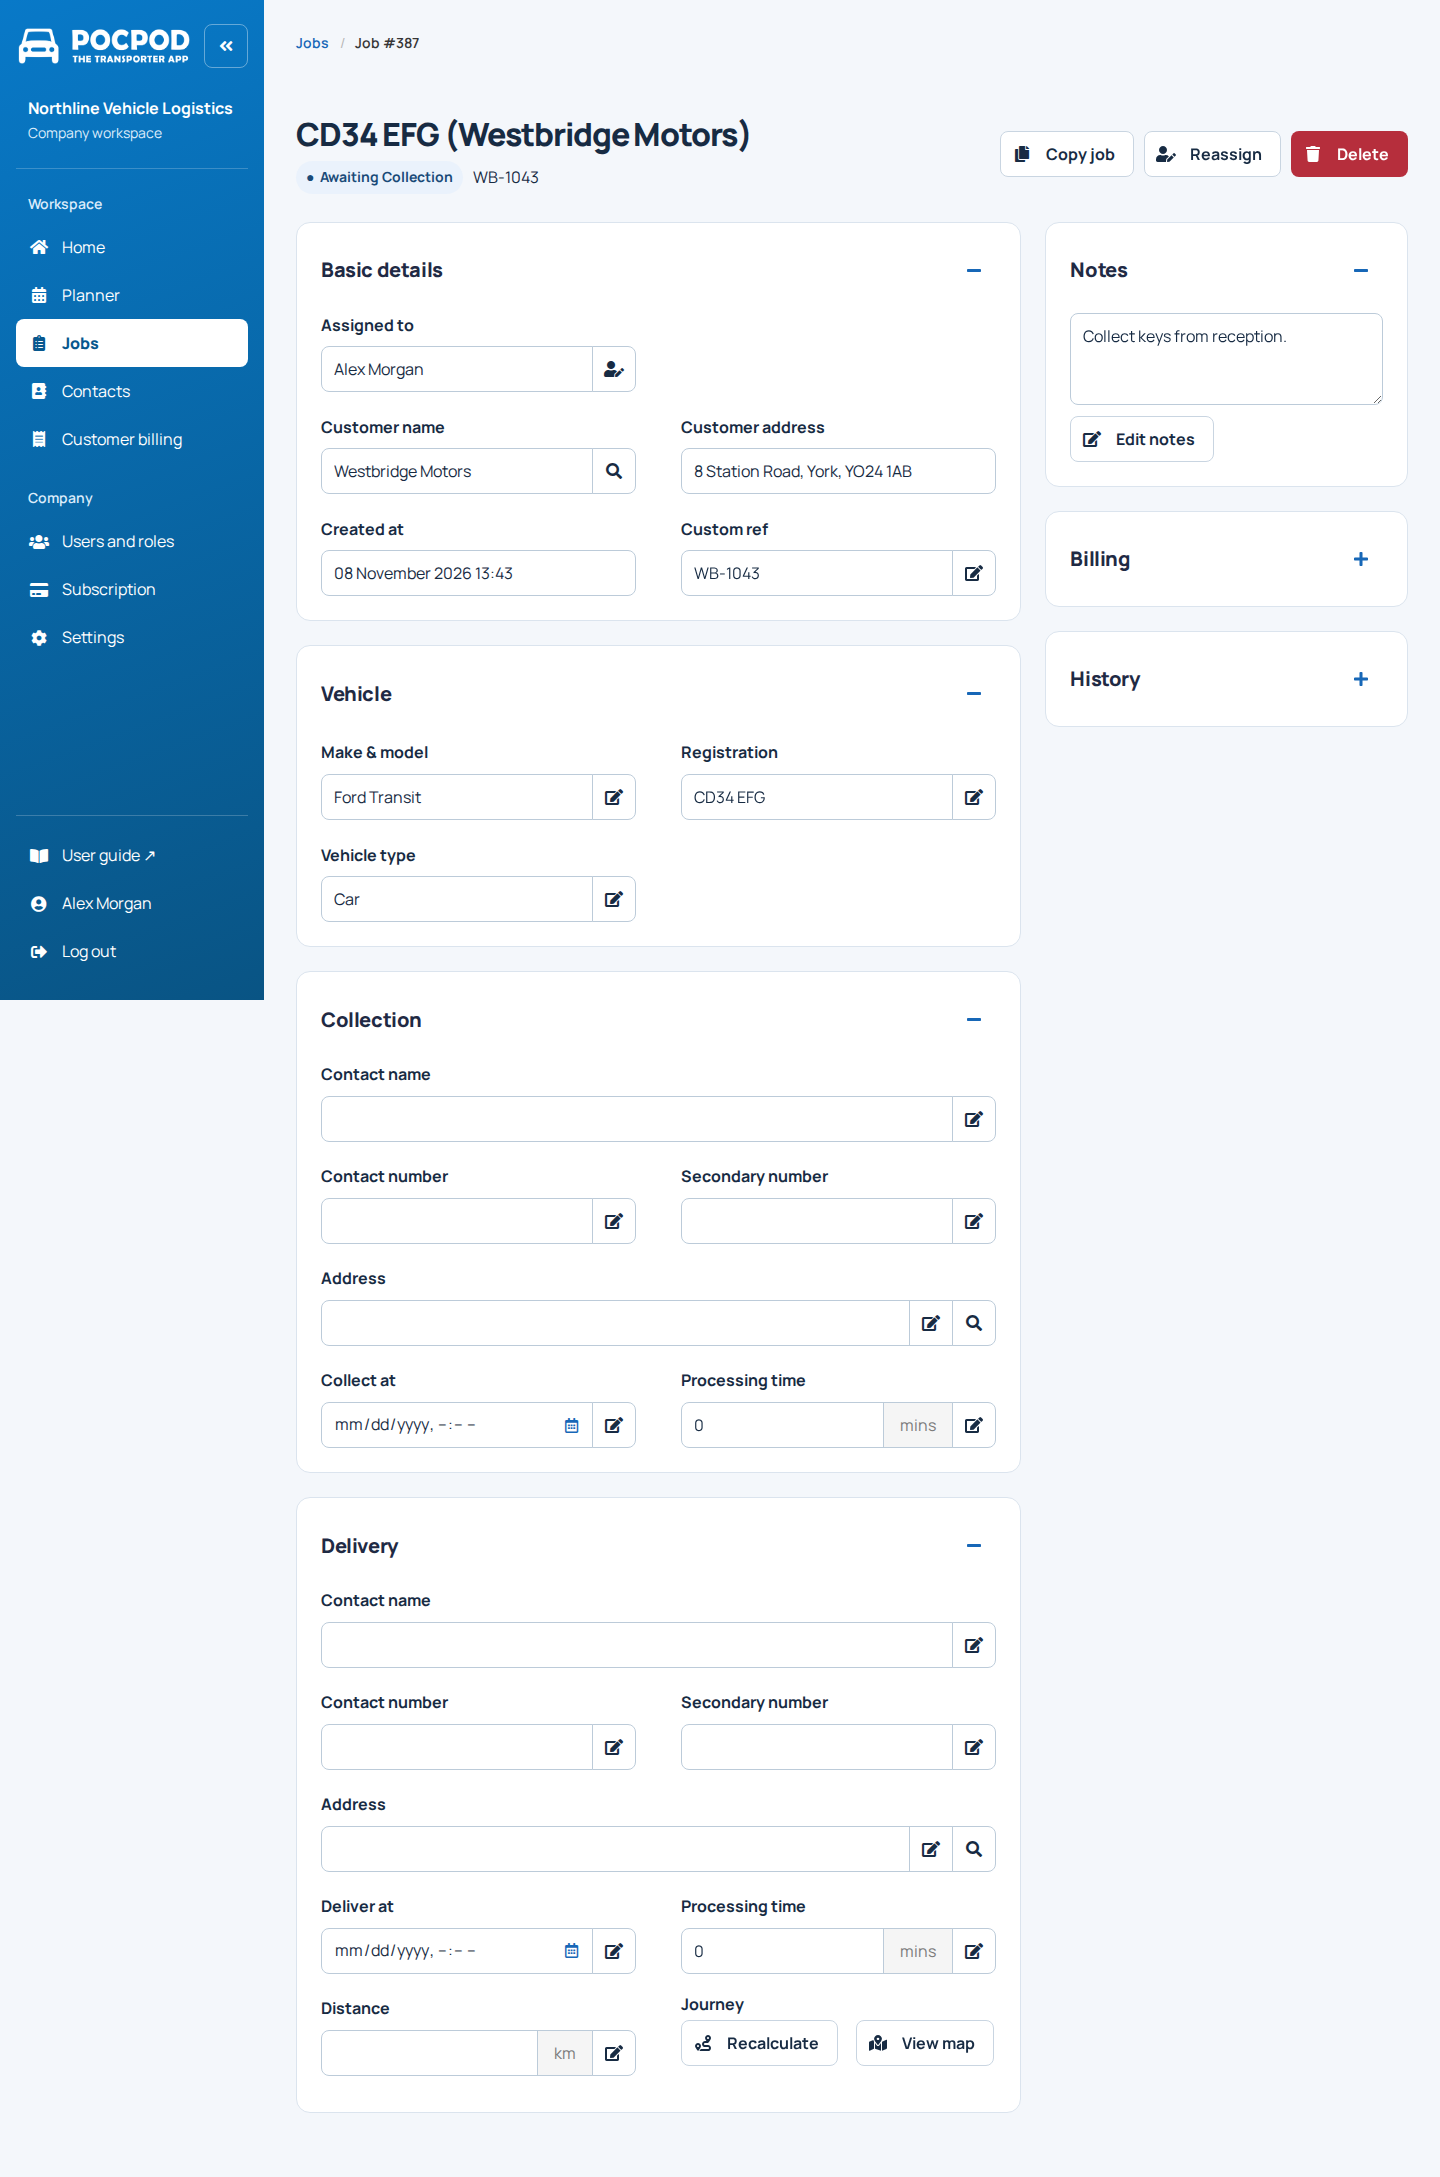
On desktop, Collection and Delivery follow Vehicle(s) in the main column. Notes, Billing and History are in the side column; Billing and History start collapsed. On mobile, Notes follows Basic details, and the three-dot menu beside the heading contains Copy job, Reassign and Delete.
For one vehicle, the panel is Vehicle. Multiple vehicles are grouped under Vehicles.
Copy a job#
Open a job and choose Copy job; on mobile, find it in the three-dot menu. Choose original locations, swap collection/delivery, or enter new locations. New locations hide the location previews and start blank.
Choose whether to keep the customer, vehicles and source mileage. Select Continue to open Create job with these choices. No new job is saved until you review and choose Create job.
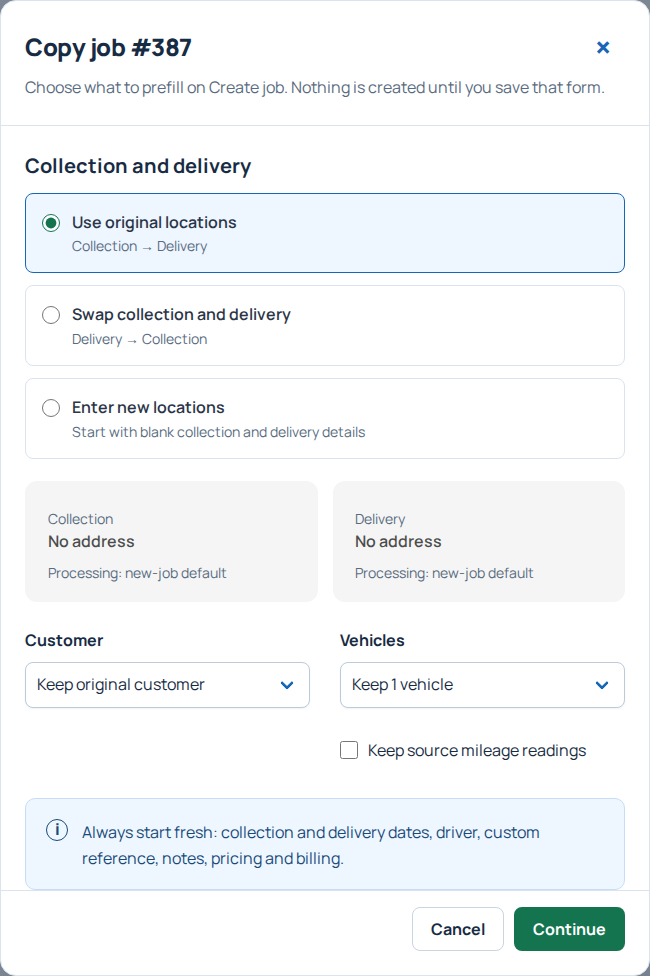
Set fresh schedule times, driver, reference and notes as needed. Copied original/swapped locations can keep a route distance; changing an address clears that distance so you can enter or calculate it again. New locations start without a distance. Pricing and billing start fresh.
Review proofs and history#
Open Collection or Delivery and use View report when proof is available. The portal lets you review vehicle, photo and proof details. History shows a chronological record of changes.
Changes made after proof completion appear in a dedicated section of the customer report. See Reports and sharing.
The Billing panel offers + Add or View as appropriate. Creating a draft from the job fills its customer and linked job; see Invoices and payments.