
Contacts and customers#
Contacts store regular customers, people, depots and locations so you can reuse their details on jobs and proofs.
Create a contact in the portal#
- Open Contacts and select Create contact.
- Enter the name and available address, phone and email details.
- Choose Auto Send Report To Email when reports should normally be sent to that contact.
- If you invoice this customer, check the invoice email and optional Default distance rate.
- Save the contact.
The optional contact rate is used after any job-specific invoice rate and before the company default from Customer billing settings. Check the final amount on the billing draft.
Find, edit or delete a contact#
Use Search name, address or phone on Contacts. Desktop shows compact rows; a phone shows cards. Edit opens the record. Actions holds the other available contact actions, such as viewing associated jobs or deleting the contact.
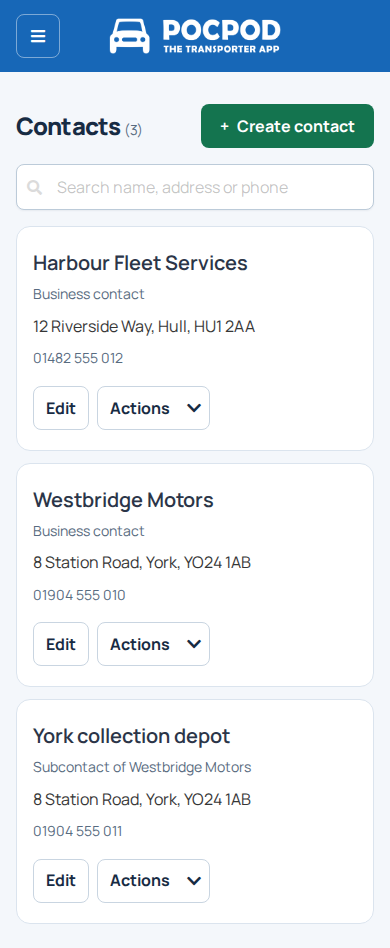
Review a delete confirmation carefully. Historical jobs keep their recorded details. Missing create/edit/delete controls usually mean your role does not have contact-management access.
Create sub-contacts#
Open the parent contact and use its sub-contact action. Enter the branch/person details, save them and confirm they are grouped under the correct parent.
A sub-contact is useful for a customer's collection depot, delivery site or named contact. Mobile edit/delete actions may appear as icons with accessible labels.
Select contacts on a job#
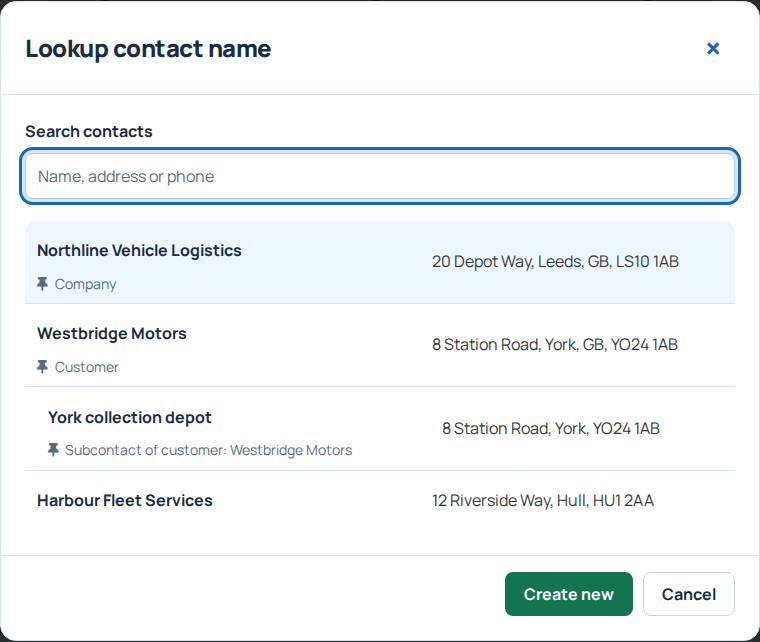
Use Add existing for the job customer, or Lookup for a collection/delivery contact. With an empty lookup search, relevant company/customer contacts are shown first with relationship labels. Once you type, matching search results replace the pinned suggestions.
A sub-contact is indented when its parent is shown above it. A search may show a matching sub-contact on its own, without indentation; read its parent description to identify the relationship.
Choosing a contact fills the details for that job. Check the address and phone before continuing. A selected-contact card can be cleared or edited using the actions offered by the current workflow.
Automatically send reports#
Enable Auto Send Report To Email on the contact and enter a valid email address. When the driver selects the contact and reaches sign-off, Pocpod fills that email address so the completed report can be sent automatically.
The driver should verify the recipient before sending. Turning the setting off does not retract an already sent report.
Use contacts in the app#
Choose Contacts in the app menu, or Find in the proof's Customer step. Search before creating a duplicate. Contact changes upload/download automatically when a connection is available.
A contact is the reusable address-book record; the customer on a job or proof is the selected information for that movement. See Use the mobile app for field work.